|
SpaceRay
|
I have started this other thread Examples of Spherical 3D Displacement Previewer by ThreeDee to show 3D examples of 3D filters, the ones that have surface and height maps.
The amazing and awesome filter that is able to do all this is this one here Spherical 3D Displacement Previewer by ThreeDee V 2.0 I was wrong thinking that 2D simple filters could not be used with this 3D filter. I have seen that using totally plain 2D images can get you a total 3D look inside this filter See this 3D sphere  |
|||||
| Posted: August 4, 2012 10:26 am | ||||||
|
SpaceRay
|
This above has been done using a plain 2D image source loading this SAME image inside the 3 maps
This here below is the 2D source image for getting the above (do not need any other "map") This beauty has been done with the well done and original Circles Forever by Skybase  |
|||||
| Posted: August 4, 2012 10:29 am | ||||||
Skybase
 |
I'm actually impressed at the fact that the smudge filter produces a cleaner edge than an average displacement function in any given 3D program. Usually the polycount for hard and clean edges for displacements tend to go high.
|
|||||
| Posted: August 4, 2012 10:39 am | ||||||
|
SpaceRay
|
And here is another one with the same settings but reducing the new "texture scale" in V 2.0
 |
|||||
| Posted: August 4, 2012 10:42 am | ||||||
|
SpaceRay
|
||||||
| Posted: August 4, 2012 11:29 am | ||||||
|
SpaceRay
|
more crowded
 |
|||||
| Posted: August 4, 2012 11:37 am | ||||||
|
SpaceRay
|
||||||
| Posted: August 4, 2012 11:50 am | ||||||
|
SpaceRay
|
Here is the only source image needed for this one above
 |
|||||
| Posted: August 4, 2012 11:54 am | ||||||
|
Ghislaine
|
||||||
| Posted: August 4, 2012 2:36 pm | ||||||
|
Ghislaine
|
||||||
| Posted: August 4, 2012 2:37 pm | ||||||
|
Ghislaine
|
ThreeDee, is it possible to have it in a transparent background ?
visit https://gisoft.ca |
|||||
| Posted: August 4, 2012 2:38 pm | ||||||
|
SpaceRay
|
Ghislaine I have tried around 10 2D images and most of them give this "firework" you are refering as the effect when used with extrusion 100.
Here I have made this 2D image with Block Busters by Kevin Worth filter 
and then in 3D  |
|||||
| Posted: August 4, 2012 3:21 pm | ||||||
|
SpaceRay
|
And with extrusion 100 you can make it explode
 |
|||||
| Posted: August 4, 2012 3:34 pm | ||||||
|
Ghislaine
|
Yes extrusion 100 to get especialy fireworks.
visit https://gisoft.ca |
|||||
| Posted: August 4, 2012 3:49 pm | ||||||
|
SpaceRay
|
I thought that it would be easy to make it have a transparent background BUT after making some tests and trying a few different things I have seen that is more complex than it seems if you do not know how the effect is done, as I have been able to take out the black BUT behind there are some semi-transparent shapes from the 3D shape Here is all I have been able to make, sorry  |
|||||
| Posted: August 4, 2012 4:04 pm | ||||||
|
SpaceRay
|
Here using a veiny leaf texture I have got this
Extrusion 3 Metallic 3 Height Blur 1 Texture Scale 47 Is really curious how using the same photo for the 3 maps you can get this beautiful result  |
|||||
| Posted: August 5, 2012 3:30 am | ||||||
|
SpaceRay
|
I have tested it with the amazing and well done Oriental Patterns by inujima
This shown here is the source of the following result 
Preset 1 Extrusion 53 Texture Scale 100 I think is really VERY DIFFERENT in 3D than the 2D version  |
|||||
| Posted: August 5, 2012 4:40 pm | ||||||
|
SpaceRay
|
same settings and source image but reducing the extrusion to 14
now looks like a metalic jewel  |
|||||
| Posted: August 5, 2012 4:47 pm | ||||||
|
SpaceRay
|
same settings
Extrusion 14 Texture Scale 52  |
|||||
| Posted: August 5, 2012 4:51 pm | ||||||
|
SpaceRay
|
Same settings
but with Extrusion 6 Texture Scale 19 will give this great amazing metalic jewel  |
|||||
| Posted: August 5, 2012 4:57 pm | ||||||
|
SpaceRay
|
||||||
| Posted: August 6, 2012 12:55 am | ||||||
|
Skybase
|
*technically 2.5 D*
|
|||||
| Posted: August 6, 2012 6:31 am | ||||||
|
Sharandra
|
||||||
| Posted: August 6, 2012 1:55 pm | ||||||
|
SpaceRay
|
Good and curious result Sharandra and thanks for sharing your examples BUT I think you are on the wrong thread, as this is a surface filter so it would be better in the 3D thread unless you made this with a 2D version.
 |
|||||
| Posted: August 6, 2012 5:37 pm | ||||||
|
SpaceRay
|
Here is a example from an awesome recent filter Dungeons and Flagons by Mike Blackney
From this source image 
with the settings showed  |
|||||
| Posted: August 6, 2012 5:43 pm | ||||||
|
Sharandra
|
I´m sorry for posting in the wrong thread, I´m not sure why you need 2 threads about the same topic tho
2.5 D |
|||||
| Posted: August 6, 2012 5:57 pm | ||||||
|
SpaceRay
|
Thanks for the link to the 2.5 D explanation, I did not know about that
For me anything that looks like 3D (not isometric projection) and have some depth, shading and lighting to simulate a 3D shape IS really 3D for me, although I agree that technically is a fake 3D.
There is no problem, just to let you know about it. I have made two threads about the same topic because really for me is NOT exactly the same, the source used to get the result is very different. I wanted to be able to know very easily and fast which one was made from 2D source and which ones are from the 3 Maps, and the easiest way for me is to have 2 separate threads as for me is not the same. 1 - 3 MAPS AS SOURCE - You use 3 maps to be able to make the 3D (well 2.5D 2 - 2D SIMPLE IMAGE AS SOURCE - The source is a plain and simple 2D image with no 3D information at all, and although the result may look also in simulated 3D, I wanted to show how surprising and amazing is the conversion from a simple 2D to a 3D sphere. |
|||||
| Posted: August 6, 2012 11:50 pm | ||||||
|
Skybase
|
But but but.... you're using the same filter
 So no matter what input there is it's the same output. So no matter what input there is it's the same output.
The catch with the categorization of 2.5D is that if there's any form of 3D-fakery going on (utilizing depth, perspective, overlap, shading, color, lighting). In a true 3D environment, as an observer, you can rotate around the object and see things actually protruding out into empty space. I just take it as something positively awesome that FilterForge works like this
Try this! Given we've been tinkering with displacement mapping previews, try actually displacing geometry using 3D software. I'm pretty sure ThreeDee's thing here does a better job with details of displacement. But my point is that you'd be engaging the object in 3D space which you'll absolutely love seeing it happen |
|||||
| Posted: August 7, 2012 12:12 am | ||||||
|
SpaceRay
|
I am using the same filter, and I get similar output BUT The source I use to get this output is NOT the same as is really different for me using 3 render maps as source than using 1 only 2D image and nothing else. I wanted to have 2 thread to make a difference in the source and see how great and awesome you can have with just plain and simple 2D images and then have another with more complex in the making 3 render maps. Why should I mix them if I do not want to ? Thanks for explaining more about the 2.5D, interesting. |
|||||
| Posted: August 8, 2012 2:17 pm | ||||||
|
SpaceRay
|
I forgot to say above that ALSO THE FILTERS used to make the spheres are NOT the same too, as ones are surface filters and the others are normal filters, and the difference for me is great from a surface filter to a normal filter
______________________________________________ Here is another example using the result from the excellent, very well done and LOVELY The source has been made much more intense, with much more contrast and raised the saturation and then converted pink shades to red shades Extrusion 19 Texture Scale 82 Height map 3 Changed the lighting with 5 lights and the other as in preset 1  |
|||||
| Posted: August 8, 2012 2:24 pm | ||||||
|
Skybase
|
lol yeah duh Just repeated what I said haha.
Nice hearts! |
|||||
| Posted: August 8, 2012 10:57 pm | ||||||
|
Carl
|
more cool stuff SR .............. wonder how Clockwork filter would look
|
|||||
| Posted: August 11, 2012 2:10 am | ||||||
|
SpaceRay
|
Thanks Carl, Glad you like them.
Well, I think that there is only one way to know it, trying it I will try it and put an example here |
|||||
| Posted: August 11, 2012 6:06 am | ||||||
|
Carl
|
I was hoping you would say that
|
|||||
| Posted: August 11, 2012 6:12 am | ||||||
|
SpaceRay
|
Sorry Carl that I has not been able to show it before, but I got a problem, one of the asteroids from the other 3D thread has broken the source image of your clockwork and now I have to make it again
Thanks to ThreeDee for the Shattered Glass  |
|||||
| Posted: August 11, 2012 8:48 am | ||||||
|
SpaceRay
|
Well Carl, Here I have made what you wanted with your well done and beautiful filter of Clockworks
Sorry that it does not look very well and beautiful as others, I have made 4 different tests and there is a problem converting this from 2D to the spherical 3D of this filter, will try to make it in another way.  |
|||||
| Posted: August 11, 2012 9:12 am | ||||||
|
Carl
|
Bad bad Space Ray, you broke my clockwork
still looks cool, needs a version of clockwork without the gradients to work better by the look of it ...... well done SR |
|||||
| Posted: August 12, 2012 12:54 am | ||||||
|
SpaceRay
|
Thanks Carl, glad you like it.
I did another version that was without the metallic looks and diffuse lighting but looks worse. Yes perhaps making it without the gradients or in a different way could be shown better the result, OR perhaps converting the 2D source with the "bump tool" filter and so you will have the 3 needed render maps and could probably look better, I do not know. |
|||||
| Posted: August 12, 2012 1:12 am | ||||||
|
Sharandra
|
Well that´s the difference between using only one diffuse map for both diffuse and height and using a bump map for the height input
The height is based on the light and dark values of the input map. Light areas are high and dark areas low. Now the values of your source image don´t always correspond with the desired height values and so you get bad results. For example you could have something in a dark color in your image that sticks out, but now when you feed it into the filter it gets pushed in and looks all weird |
|||||
| Posted: August 12, 2012 1:14 am | ||||||
|
SpaceRay
|
Thanks Sharandra for the explanation and is well done, I knew already something about it but not exactly how, now is more clear.
Here is another example from the excellent filter Dungeons and Flagons by Mike Blackney  |
|||||
| Posted: August 15, 2012 9:41 am | ||||||
|
SpaceRay
|
I have seen that I forgot to tell a very important thing here, and is that if you want to use these 2D images instead of the render maps, you just load the same image replacing the 3 render maps settings as you can see in the screenshot that is on this above post here.
|
|||||
| Posted: August 21, 2013 3:16 am | ||||||
|
PixelSlaughter
Posts: 105 |
Thats genial! Cheerz from Bulgaria!
|
|||||
| Posted: August 21, 2013 8:15 pm | ||||||
|
SpaceRay
|
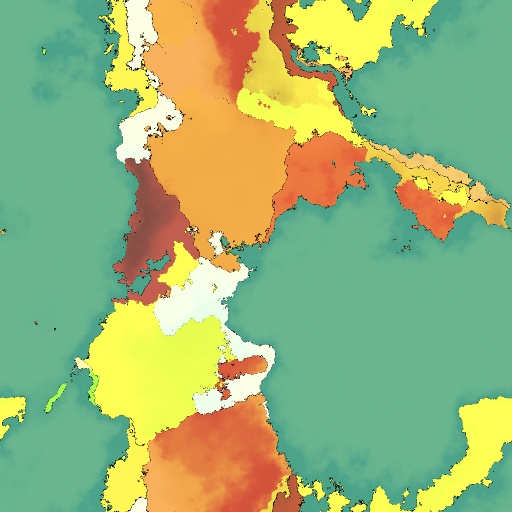
Well, I have just discovered when trying this again that although this is true, alternatively you can use: Diffuse Map = one image as the color tint that will be shown as overlay Bump Map and Reflectivity Map = with another different one that will be the texture background In this example I have used these 2 images Diffuse map (made from my own sierpinski filter) 
Bump Map and Reflectivity Map (made from Circular Reasoning by Rachel Duim) 
and you get this using the Spherical Previewer 2 zoom added filter that you can download here  |
|||||
| Posted: October 20, 2020 1:09 am | ||||||


Join Our Community!
Filter Forge has a thriving, vibrant, knowledgeable user community. Feel free to join us and have fun!
33,711 Registered Users
+18 new in 30 days!
153,531 Posts
+36 new in 30 days!
15,347 Topics
+72 new in year!
Online Users Last minute:
24 unregistered users.
Recent Forum Posts:
- Kaleidoscopic Variations Vol. 2 by jhantares by jhantares
September 10, 2025 - Polygonal Images Set by Ramlyn by westdale
September 10, 2025 - FF Killing Resolution by SpaceRay
September 9, 2025 - Geometry Spinner by Rachel Duim by Rachel Duim
September 6, 2025 - Channel Glitch by Martin Naumann by SpaceRay
August 31, 2025 - Circuit Glitch by Martin Naumann by SpaceRay
August 31, 2025 - Groovy Rays by Ramlyn by Ramlyn
August 31, 2025 - Is Ultraforge dead? by dpankros
August 30, 2025 - Component Instances by AussieDecalf
August 27, 2025 - Hyperbolic Tiling Challenge by AussieDecalf
August 27, 2025 - Chaos Fields by SpaceRay
August 27, 2025 - New awesome TEXT component FF 14 - How to get the most of it? by SpaceRay
August 20, 2025